- 100% Cotton Fabric – Lightweight and breathable (washed and dried).
- Beeswax Pellets or Grated Beeswax – The main ingredient for coating.
- Pine Resin (Optional) – Adds extra stickiness for better sealing.
- Jojoba or Coconut Oil – Keeps the wrap flexible.
- Baking sheet
- Parchment paper or silicone baking mat
- Paintbrush (for spreading melted wax)
- Oven or iron
- Cut Your Fabric:
Cut your cotton fabric into desired sizes (commonly 8×8, 10×10, or 12×12 inches). Pinked shears help prevent fraying. - Prepare Your Mixture:
Mix roughly:- 1 tablespoon beeswax pellets
- 1 teaspoon pine resin
- 1 teaspoon jojoba or coconut oil
(This ratio can vary slightly depending on how sticky or soft you prefer your wraps.)
- Arrange Fabric:
Place your fabric on a parchment-lined baking sheet. Sprinkle the wax mixture evenly over it. - Melt the Wax:
Place in a preheated oven at 180°F (82°C) for about 5 minutes, or until the wax has fully melted. - Spread Evenly:
Use a clean paintbrush to evenly distribute the melted mixture across the fabric surface. - Dry and Set:
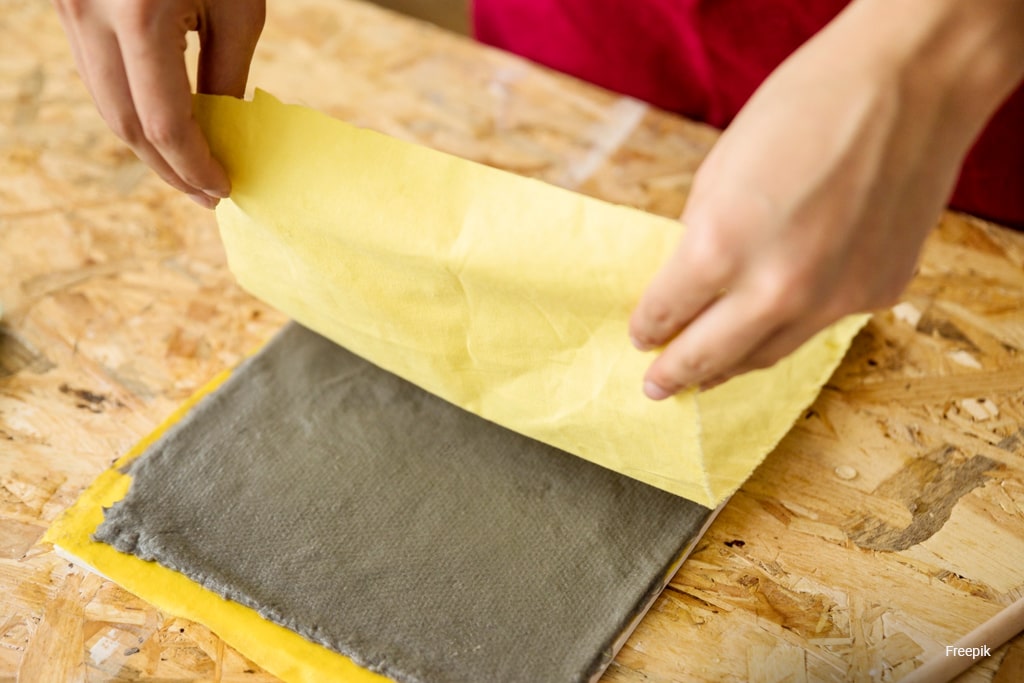
Lift the fabric carefully (it will be hot!) and wave it gently until the wax hardens. Hang or lay flat to cool. - Place a piece of parchment paper on your ironing board.
- Lay the fabric on top and sprinkle your wax mixture evenly.
- Cover with another piece of parchment paper.
- Gently iron on low to medium heat until the wax melts and spreads evenly.
- Remove the top parchment layer, let it cool, and you’re done!
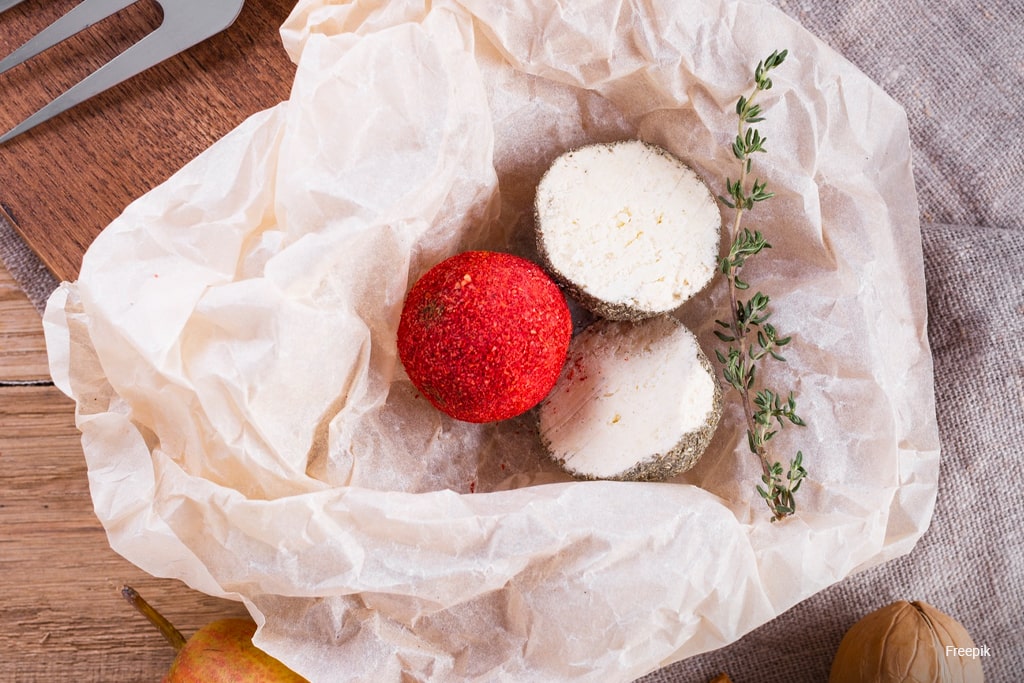
- Wrap fruits, vegetables, herbs, and cheese.
- Cover bowls, jars, or leftover dishes.
- Wrap sandwiches or snacks for lunch.
- Store bread and baked goods to keep them fresh.
- Clean Gently: Wash with cool water and mild dish soap. Avoid hot water — it can melt the wax.
- Air Dry: Hang or lay flat to dry.
- Store Properly: Keep in a cool, dry place (away from direct sunlight or heat sources).
- Refresh When Needed: If your wrap loses stickiness, reapply a thin wax layer and melt it again.
- Vegan Option: Substitute candelilla wax for beeswax to make vegan-friendly wraps.
- Scented Wraps: Add a drop of lavender or lemon essential oil for a pleasant aroma.
- Seasonal Designs: Make wraps with festive or floral fabrics for gifts or special occasions.
- Gift Idea: Bundle a few wraps together and tie with twine — a perfect eco-friendly present!
In a world where plastic pollution is choking our oceans and landfills, making small sustainable swaps in our daily lives can create a big impact. One of the simplest — and most rewarding — eco-friendly changes you can make in your kitchen is switching from plastic wrap to DIY beeswax wraps.
These reusable, biodegradable wraps keep your food fresh, look beautiful, and help reduce single-use plastic waste. Plus, they’re easy and fun to make at home!
In this guide, you’ll learn everything you need to know about beeswax wraps — what they are, why they’re better than plastic, and how to make your own with just a few natural ingredients.
What Are Beeswax Wraps?
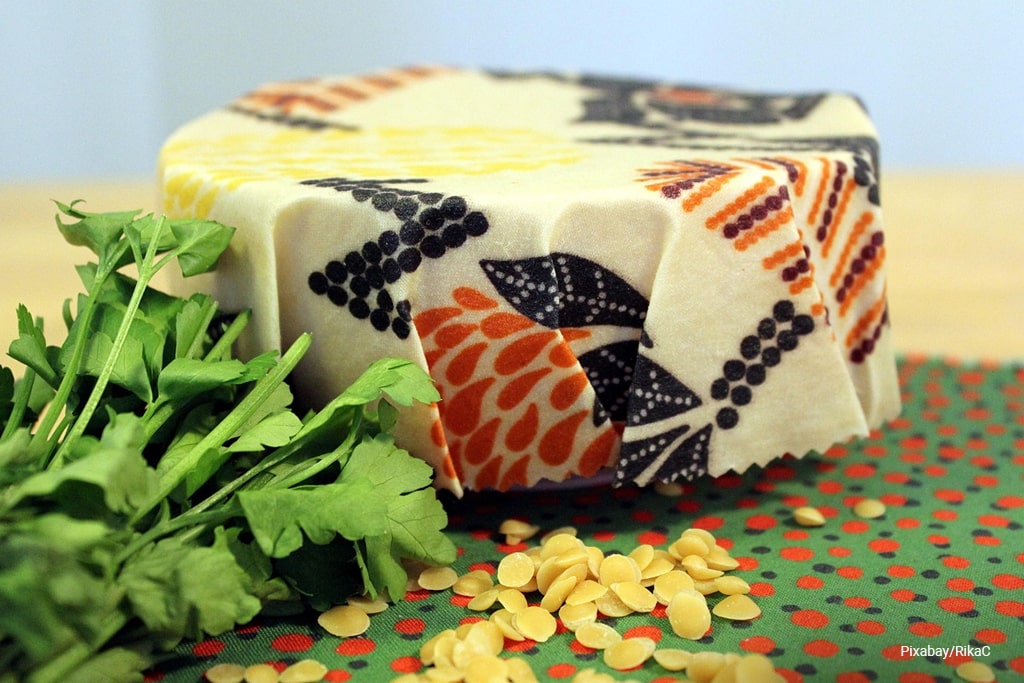
Beeswax wraps are cloths coated with a blend of beeswax, resin, and oil, creating a slightly sticky, water-resistant layer. They’re pliable, reusable, and perfect for wrapping fruits, vegetables, sandwiches, cheese, or covering bowls.
They work similarly to plastic wrap — but without the waste. When you press the wrap around food or a container, the warmth of your hands softens the wax, creating a natural seal that keeps food fresh.
And the best part? After months of use, they can be refreshed or composted, returning harmlessly to the Earth.
Why Choose Beeswax Wraps Over Plastic?
1. Eco-Friendly & Biodegradable
Unlike plastic wrap, which can take hundreds of years to break down, beeswax wraps are made from all-natural materials that decompose safely.
2. Reusable and Long-Lasting
Each wrap can last up to a year with proper care. When it starts to lose its stickiness, you can easily recoat it or compost it.
3. Non-Toxic and Food Safe
Beeswax has natural antibacterial properties, helping to keep your food fresher for longer — no chemicals or microplastics involved.
4. Aesthetic and Customizable
From floral cotton patterns to minimalist designs, you can personalize your wraps to fit your kitchen style.
5. Cost-Effective
While buying beeswax wraps can be pricey, making your own is budget-friendly — and a fun, sustainable DIY project for families.
What You’ll Need to Make DIY Beeswax Wraps
You don’t need fancy tools — just a few natural ingredients and supplies.
Ingredients:
Tools:
Step-by-Step: How to Make Beeswax Wraps
Create your own eco-friendly food wraps with this simple step-by-step guide! Perfect for keeping food fresh while reducing plastic waste, this DIY project is fun, sustainable, and budget-friendly.
Method 1: Oven Method (Easiest for Beginners)
Once dry, your wrap is ready to use!
Method 2: Iron Method (No Oven Needed)
How to Use Beeswax Wraps
Beeswax wraps work best for cool or room-temperature foods — avoid direct contact with raw meat or hot food.
Use Them To:
To seal, press the wrap around the item using the warmth of your hands. It will hold its shape until unwrapped again.
How to Clean and Maintain Your Wraps
To keep your beeswax wraps lasting longer:
Eco-Friendly Tips and Variations
The Bigger Picture: Small Steps, Big Change
By switching to beeswax wraps, you’re doing more than reducing plastic waste — you’re participating in a global movement toward sustainable living.
Each time you skip single-use plastic, you help protect marine life, reduce landfill waste, and inspire others to make conscious choices.
Small actions, multiplied by millions, can create a cleaner, greener planet.
Making Your Own Plastic-Free Food Storage
Making your own beeswax wraps is a fun, practical, and eco-friendly project that promotes sustainability right in your kitchen. It’s a small act with a big environmental payoff — and one that connects you to nature’s simple gifts.So grab your fabric, melt some wax, and start crafting your own plastic-free food storage alternative today. Your meals — and the planet — will thank you.


